“I’m not a chef, I’m Italian”- David Rocco


Friday, September 28, 2012

Vegetable Lasagna


Ciao a tutti! I would like to remind you that I am a semi-finalist in Eggland’s Best “Your Best Recipe” Contest!! My recipe for Chocolate Hazelnut Espresso Cookies was selected. You can please vote until Sept. 30th 12PM. You can take a look at http://www.egglandsbest.com/yourbestrecipe and on the Eggland's Best "Your Best Recipe" Contest tab on the Eggland's Best Facebook page at https://www.facebook.com/egglandsbesteggs/app_251842034899170 - you have to “like” Egglands Best. You will see my recipe under the Dessert Category under Caroline B. I would very much appreciate it. Thank you all!

Squash, zucchini, eggplant, tomatoes, purple peppers and  my cute little pumpkin!!
This afternoon I went to my local farmers market. They have a beautiful selection of baked goods, eggs, jams and jellies and of course fresh fruits and vegetables. The produce is some of the loveliest and prettiest I have ever seen. I’m not kidding. I know it seems strange to call vegetables pretty, but they really are. I couldn’t resist. The vegetables were calling my name. Sometimes I go the farmers market with a list since I already know what I want to prepare, but the vegetables gave me a wonderful idea. And that idea was Vegetable Lasagna.

When you think of lasagna, you probably think of classic lasagna with Bolognese sauce, cheese and noodles and that’s fantastic. But this “lasagna” has no noodles. That’s right, NO NOODLES. The vegetables are used in place of the noodles. For anyone doing a gluten free, low carb or paleo diet, this is the perfect meal for you. This lasagna is also a wonderful vegetarian entrĂ©e and it’s a great way to get your kids to eat some veggies. As soon as your kids see this beautiful, bubbling lasagna fresh out of the oven, they’ll forget that it’s actually good for you! It combines fresh grilled vegetables, cheese and raw tomato sauce. What else do you need?

I used eggplant, zucchini and yellow squash. I find that these vegetable are the best to use when making“lasagna” since you can cut them in nice long strips that replicate noodles. I also like using eggplant because it has a more “meaty” texture then other vegetables, so if you’re a carnivore at heart, this should make you happy! This recipe does have a lot of steps, but I promise you it is worth it. It is just so, so delicious. As always, I LOVE to hear from you, so please comment and let me know what you think!!

Fresh Vegetable Lasagna


The vegetable part:
2 large eggplants
3 zucchini
3 yellow squash

The Marinade:
Olive oil
Salt
Pepper
Red Pepper
Dry basil

The cheese part:
20 ounces of ricotta
Salt
Pepper
Italian parsley- chopped
Red pepper
1 cup of parmigiana cheese

The tomato part:

2 fresh tomatoes
3 cloves of garlic
Salt
Pepper
2 tbsp. pesto- (If you don’t have pesto, add some chopped basil, 1 tbsp. parmigiana and 2 tbsp. olive oil to a food processor and there ya go!)

First step- Start by rinsing your vegetables lightly, you want them to be nice and clean. Begin with the eggplant since that takes the longest to grill. Cut length wise, about ¼ inch thick. Prepare a flat top griddle with lots of olive oil over medium heat. You can play it by ear with exactly how much oil you use.

Start making your marinade. Combine olive oil, (again, exactly how much you want to use is up to you, I would suggest starting with around 4 tablespoons and adding as you go along if you need to) salt, pepper, red pepper and dry basil. All of this is quanto basta- to taste!

Brush one side of the eggplant lightly with the marinade and put on the griddle (marinated side down) and then brush more of the marinade on the other side. As the eggplants are finished cooking, either put them on a tray, plate or a wire rack, so any excess oil drips off.

The grilled vegetables!!

Cut your zucchini and yellow squash, length wise. Again, cut a ¼ inch thick. Wait for all of the eggplants to finish cooking. Since you are using two large eggplants, this could take up to an hour. Each side usually takes around 15-25 minutes depending on your stove. Once all the eggplant is done, do the same with the yellow squash. Brush one side with the marinade, put on the griddle (marinated side down) and brush your marinade on the other side. All of the yellow squash will take around 45 minutes to cook (10-20 minutes each side). Put the finished squash on your tray.

Now repeat the same steps with the zucchini. Brush one side with the marinade, put on the griddle (marinated side down), and brush more marinade on the other side. The zucchini should take around 40 minutes to cook (10-20 minutes each side.) Move the cooked zucchini to your tray with all of the other grilled vegetables.

Second Step- Let the vegetables cool for a few minutes and start preparing your cheese mixture. Combine ricotta, salt, pepper, chopped Italian parsley and red pepper. Mix until combined. We will be using the parmigiana as is, so just have it ready!!

The ricotta mixture 

Third Step- Clean your tomatoes and do a rough chop. I like the pieces kind of chunky, but you do it however you like! Put your chopped tomatoes in a bowl. When you chop tomatoes, a lot of the juice seeps out, but don’t throw it away!! Add it to the bowl. Chop your garlic and add with the tomatoes. Add salt, pepper and pesto. Mix.

The raw tomato sauce

Fourth Step- Preheat your oven to 350 degrees. Prepare a large casserole pan with lots of olive oil. You don’t want your bottom layer of vegetables sticking to the pan. Now is the fun part, arranging it!! The way I like to do it is by having each layer a specific vegetable, as opposed to mixing them. That way, in each bite, you get a little of everything!! Start with a layer of eggplant. You can make each layer as thin or thick as you like. Once the eggplant is done, spread a generous amount of ricotta on top. Now do a layer of zucchini. Spread more ricotta. Now do a layer of squash. Now..you guessed it, more ricotta!! 

Continue doing these steps until you have no more ricotta or vegetables left. Cover the top layer with the raw tomato sauce and sprinkle the parmigiana cheese all over the top!! Put in the oven and cook for an hour and half. Take it out of the oven and let it sit for 
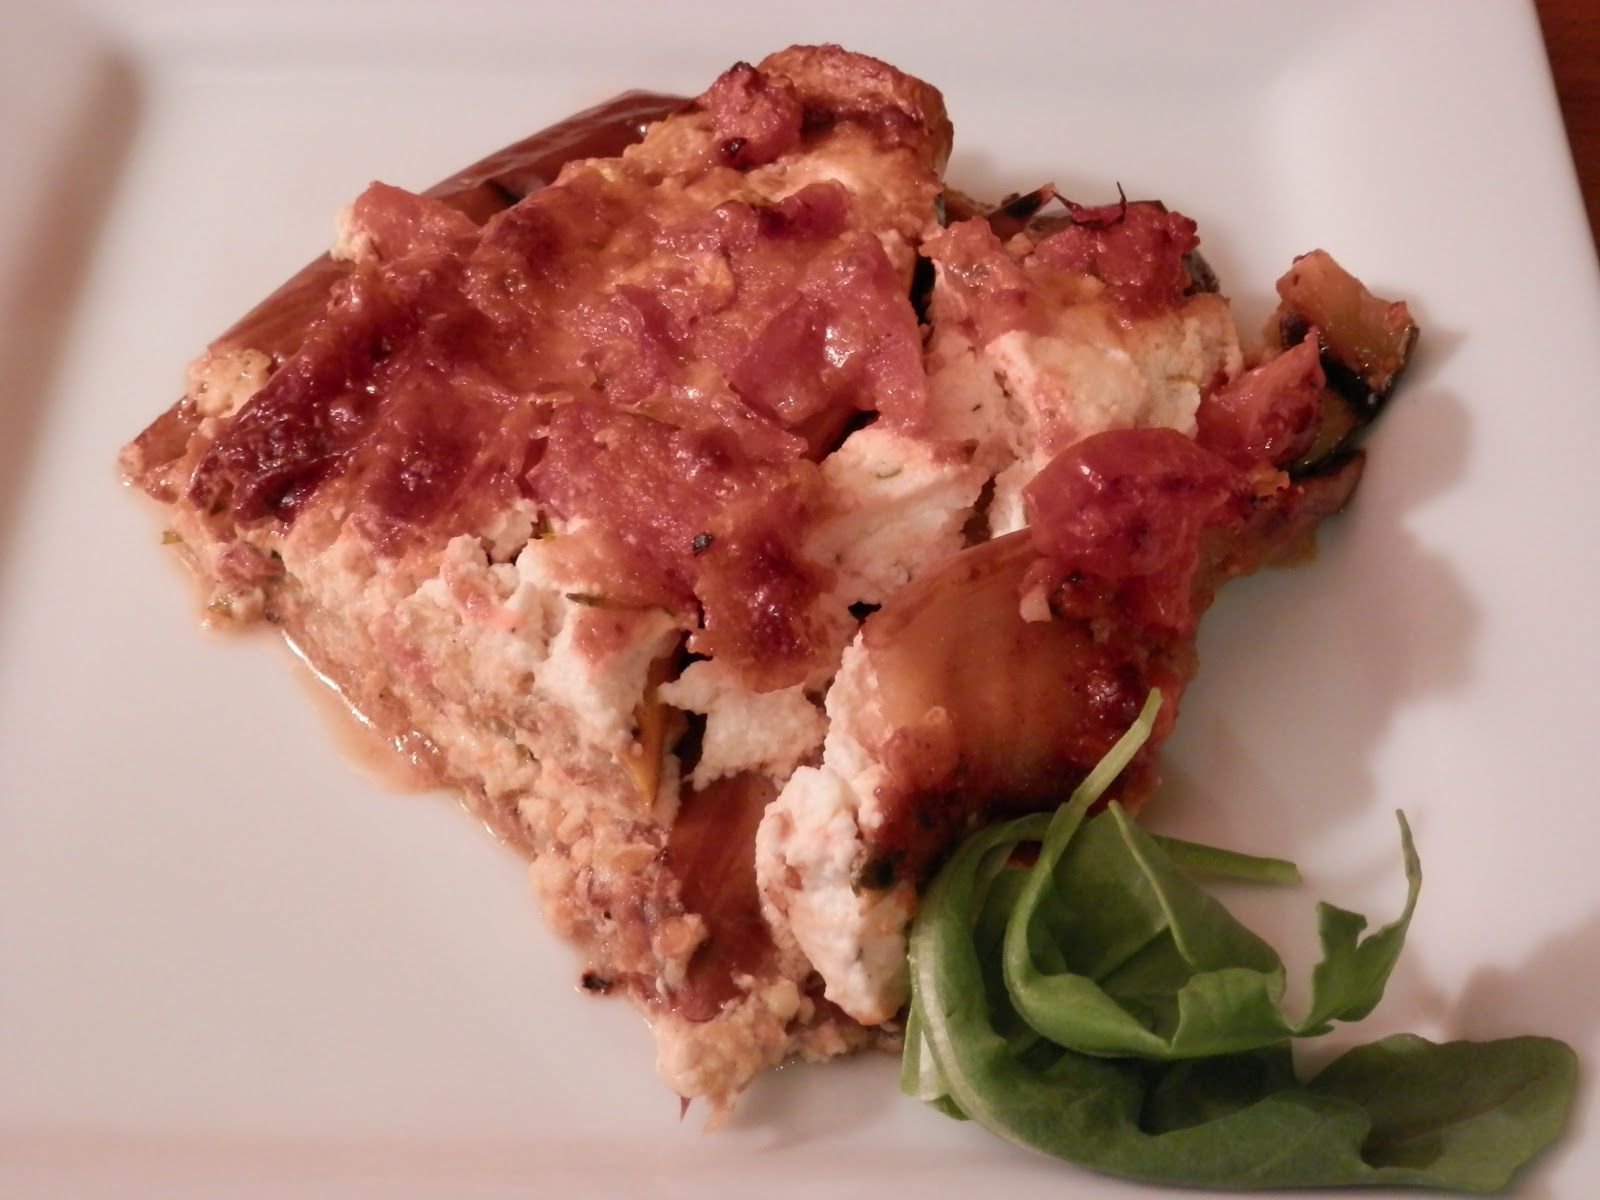
at least 20 minutes before serving. Cut a nice big slice for yourself and enjoy with a glass of red wine!! Buon Appetito!!

Tuesday, September 25, 2012

Spaghetti Margherita


Ciao a tutti!! Today I will be sharing with you some delicious Spaghetti Margherita! I would also like to remind you that I am a semi-finalist in Eggland’s Best “Your Best Recipe” Contest!! My recipe for Chocolate Hazelnut Espresso Cookies was selected. You can please vote until Sept. 30th 12PM. You can take a look at http://www.egglandsbest.com/yourbestrecipe and on the Eggland's Best "Your Best Recipe" Contest tab on the Eggland's Best Facebook page at https://www.facebook.com/egglandsbesteggs/app_251842034899170 - you have to “like” Egglands Best. You will see my recipe under the Dessert Category under Caroline B. I would very much appreciate it. Thank you all! Now…onto the pasta!!

I love the idea that a lot of Italian food is based on simplicity. Nothing fancy or over complicated, just good old food and I think that that is what makes Italian cuisine so appealing to everyone. You don’t necessarily have to be a trained chef or even that great in the kitchen to be able to make a fantastic meal. Which brings me to this….Spaghetti Margherita.

When I was little, I obviously ate a lot of Italian food. Whenever I went to my nonna’s, she would make me tons of fried cauliflower, meatballs and chicken cutlet. But maybe you noticed that something was missing. Pasta. I’ll tell you why. I didn’t like pasta until I was around twelve. I know, I know, I’m still ashamed to admit it. Everyone loves pasta, in one form or another, whether we’re talking about Italian penne, Chinese lo mein or American mac and cheese. I just didn’t like it, I don’t know why; I couldn’t tell you if you asked. Now of course, I’m a pasta fanatic!! Give me any sort of pasta and I will make something amazing out of it. Today I have prepared a classic and easy dish of Spaghetti Margherita.

In 1889, during a visit to Naples, Queen Margherita of Italy was served a pizza that had the colors of the Italian flag, red (tomato), white (mozzarella) and green (basil). This kind of pizza has been named after the Queen as Pizza Margherita and of course you can see many recipes that simply use the same red, white and green method and name it after the Queen as well, like this pasta dish.

This is an incredibly easy pasta dish to prepare. All you have to do is make the fresh tomato sauce, sprinkle some mozzarella over the pasta and top with a few leaves of fresh basil and there you have it! Spaghetti Margherita!


Spaghetti Margherita


1 box of whole wheat spaghetti (you can use white flour of course)
Salt- for the pasta water

15 ounce can of crushed tomatoes
¼ cup olive oil
6 cloves of garlic (or as much as you like)
Salt
Pepper
Basil (finely chopped)
Crushed Italian herbs

1 fresh mozzarella
Basil- as much as you would like to top off your pasta

Start by preparing your water over the stove on high heat. Salt your water.
Prepare a deep pot with your ¼ cup of olive oil; make sure the pot is big enough since you will eventually be putting the pasta in it.

Coarsely chop your garlic and add to the pot, cook until soft. Add tomatoes, olive oil, garlic, salt, pepper, basil and crush Italian herbs. Cook 6-7 minutes, until garlic is soft and then for an additional 15 minutes while the pasta water boils.

When the pasta water is boiling, put in all of the spaghetti until it is al dente. I find that spaghetti cooks pretty quickly, probably around 5-7 minutes depending on your stove. Now, drain your water and add the spaghetti to the tomato sauce.

What I like to do is use the mozzarella and basil on each individual portion. So, divide your portions and shred some mozzarella directly on top. Assuming the pasta is slightly warm, it should melt the cheese slightly. If you don’t want the cheese to melt, let the pasta cool for at least ten minutes before serving. Then, put a few fresh leaves of basil on top. Buon Appetito! 

Saturday, September 22, 2012

Cheesemaking Kit and Garden-in-a-bag from Uncommon Goods


Ciao a tutti!! I am so excited to be posting my first product review with UncommonGoods, be sure to take a look at Uncommon Goods. When I was browsing their site, some of their products, especially the food kits sounded too good to be true! Mushroom kits, beer making kits and the ones that I just had to choose, the Cheesemaking Kit and the Grow Your Own Marinara Kit. I mean, the opportunity to make fresh mozzarella AND fresh Ricotta AND grow tomatoes, basil and oregano?!!? Come on!! How could I not jump at the chance to try it? These just seemed like the perfect fit for me. After all, my blog is completely devoted to Italian food and let’s face it; we love our cheese, tomatoes and herbs!

When I got the kits in the mail, I felt like a kid on Christmas morning. I was SO excited to open them and give them a try. I have always wanted to make fresh cheese, but I have honestly never gotten around to it. I know it can be a lot of work and I felt a little intimidated. But what seemed so appealing about this kit, (besides the obvious aspect of preparing fresh cheese) was that it really made it appear very easy to do. Just a few steps and before you know it, you have fresh cheese!! Oh, the fun that we’ll have together. I have a few photos that I took of the products, but if you would like to see some more, you can browse Uncommon Goods. 

The Grow Your Own Marinara kit includes seeds to grow lovely, juicy tomatoes, fresh oregano and fragrant basil. What’s fantastic about this kit unlike so many other plant kits is that you can grow it right in the bag that the seeds come in, so you don’t even need any extra space. These are lovely to put in your garden, on your patio or if you’re in an apartment, your kitchen. All you need is some sunlight!

Rickis Cheesemaking Kit
Now, onto the cheese!!! As I mentioned, I’ve never made cheese, I was too afraid of having to live up to the expectations of creamy, milky, buttery fresh cheese. But this kit took all of my worries away. Plus, everything you need is included; all you have to do is add milk. If you want, you can even make it with goat’s milk or powdered milk. Yes, it’s just that simple!! (I’m starting to sound like an infomercial, aren’t I?) This kit also has the ability to make 30 batches of cheese! That’s right, 30 batches!! And it only takes 30 minutes to prepare (Okay, I’ll stop now). Seriously though, as you can tell, I was very excited to get started. The kit includes an easy to follow recipe booklet, dairy thermometer, citric acid, butter muslin, vegetable rennet tablets and cheese salt. Fresh cheese, tomatoes and herbs, here I come!!


I decided to make ricotta for my first time. Last summer when I was in Italy studying Opera, I remember having the most amazing fresh herbed ricotta. It was so good, I just….I can’t even tell you, that’s how good. It was so creamy; I spread it on fresh bread and ate it for lunch with tomatoes. To make the cheese, it does involve a good amount of steps, but don’t get nervous, even though it looks like a lot, they are all very simple steps and it is easy to follow as long as you read it carefully. I would suggest reading through all of the instructions a few times just to familiarize yourself with the steps, so when you make it, you know exactly what to expect.


The cheese over the hot water
Basically, you first pour your milk into a pot, add citric acid and salt and stir. Then, you heat the milk and continue to stir some more. As soon as you start to notice the curds and whey separating, you turn off the heat and let it sit. You line a colander with a butter muslin and ladle the curds in the cloth. All you have to do next is tie the cloth into a bag and let it drain for half an hour. Then…drum roll please……you can eat the cheese!!!! It’s so easy. 

As I said, I added some Tuscan spices to my cheese, along with a swirl of pesto and mamma mia, was it good!! It is hard to find fresh ricotta in most places, you usually just have to settle for whatever brand the supermarket has, so this was a welcome change. This really reminded me of the fresh ricotta I had in Italy, it was so creamy and smooth. Seeing how easy it is to prepare, I would without a doubt get this kit again or give it to one of my foodie friends as a present. 

Ricotta Cheese


The finished product with some Tuscan herbs and pesto
1 gallon of milk
1/4 piece of rennet tablet
11/2 teaspoon citric acid
1 tsp. salt

Now…the herbs. These are literally a Garden in a Bag, in fact, that’s what it says on the bag!!! This kit includes the bags for tomatoes, oregano and basil. For all of these fresh and tasty herbs and tomatoes, all you have to do is cut open the bag; take out the packets of soil and seed.  Pour the soil into the Garden-in-a bag and level the soil. Sprinkle the seeds evenly over the soil and then lightly water seed into the soil. You then place a plastic bag over the top of the Garden-in-a bag and put it in a warm area out of direct sunlight until the seeds sprout. 

Garden-in-a-bag
Within ten days when the seeds have started sprouting, you remove the plastic bag and place in a bright location. The oregano and basil will take around six weeks and the tomatoes take about sixty days to grow. I will post again when they have all fully grown and let you know how they come out! I have always wanted a full garden, I love the idea of growing my own herbs, but I live in an apartment and while I have a terrace where I could grow some stuff, I just wasn’t sure about the whole idea. These make it very simple and you don’t need tons of space and you don’t have to invest a lot of time in maintaining, the way you would have to with a garden. Be sure to take a look so you can get some even more detailed information about these kits and all of the other fun goodies that they offer at Uncommon Goods. 

So, what exactly did I do for dinner with my beautiful homemade creations?!?! Well, I served my fresh herbed ricotta on lightly toasted whole wheat ciabatta and drizzled with some pesto and had some yummy tortellini with meatballs. As for the herbs, I’ll just to have to wait and see!! Buon Appetitio!!  

Thursday, September 20, 2012

Chocolate Espresso Hazelnut Cookies- Recipe Contest Semi Finalist


Ciao everyone!! Today I am so excited to officially announce that I am a semi-finalist in Eggland’s Best “Your Best Recipe” Contest!! My recipe for Chocolate Hazelnut Espresso Cookies was selected. Voting takes place between Sept. 20th at 12PM until Sept. 30th 12PM. You can take a look at http://www.egglandsbest.com/yourbestrecipe and on the Eggland's Best "Your Best Recipe" Contest tab on the Eggland's Best Facebook page at https://www.facebook.com/egglandsbesteggs/app_251842034899170 - you have to “like” Egglands Best. You will see my recipe under the Dessert Category under Caroline B.

In honor of the contest, I would like to share the original post with you. Thank you again for reading and supporting my site, it really means so much to me.

Il Dolce (Dessert)
I absolutely adore chocolate, nuts and espresso. All together or separately, it makes no difference. So when I was in Rome this past summer and stumbled upon a gelato cafe right around Piazza Navona and saw “Baci Espresso” as a flavor, I knew I was in the right place.  Baci translates to kiss in Italian, but I bet if you think of Baci, you think of those amazing chocolates with the hazelnut center. The gelato had a deep chocolate espresso base with chunks of chocolate and hazelnuts. It was absolutely amazing. Come summer I plan to take out my ice cream maker and try to recreate some of the gelato I had in Italy (including the most intense chocolate gelato I have ever had, called nero fondente.) But, I’m not quite ready for gelato. So until then, I have recreated the taste and made these equally delicious Baci Espresso cookies. While they are not the prettiest cookies, they are certainly pleasing to the palette. They are fudgy, chocolaty and the hazelnuts add a lovely crunchy to an otherwise smooth cookie.

Chocolate Hazelnut Espresso Cookies


10 ounce of dark chocolate
2 Eggland’s Best eggs
½ cup sugar
2 teaspoons vanilla
¼ cup all purpose flour
¼ teaspoon baking powder
2 tablespoons espresso powder
1/8th teaspoon salt
2 tablespoons unsalted butter.
1 ½ cups of hazelnuts

Preheat oven to 350 degrees. Line cookie sheet with parchment paper. Whisk eggs, sugar and vanilla in a small bowl. In another bowl, whisk flour, baking powder, espresso powder and salt together. Stirring frequently, melt butter with chocolate. Whisk in the egg mixture. Stir in the flour and nuts. Scoop rounded tablespoons of batter on baking sheet.
Bake until the surface of the cookie looks dry and the centers are still gooey, around 11-13 minutes. Take out of the oven and let cool. If you don’t eat them all in one sitting, store the leftover cookies in a tightly sealed container.
Buon Appetito!

Tuesday, September 18, 2012

Chocolate Espresso Molten Cakes


Ciao!! I have some very exciting news to announce on Thursday Sept. 20th, so please stay turned and be sure to check in on my facebook page for updates. Until then, I have some delicious Chocolate Espresso Molten Cakes to share with you!

I love soft gooey chocolate cakes. You know the kind I’m talking about. The kind where it’s firm on the outside and flows like lava in the center. Does anything taste better? I think not. Plus, these are incredibly easy to make and they look really impressive. These are great to prepare for a party because you can make the batter in advance and let them sit in the refrigerator until you are ready to pop them in the oven so they are nice and warm. This version is gluten free, as it is made with nut flour, so these are perfect for anyone with a gluten allergy. If you do not like the taste of nut flour, you can easily substitute with regular flour or whole wheat.

These are very intense little cakes, so be warned!! I use bittersweet chocolate, but please feel free to use semisweet. I love making these with espresso powder, it just ups the intensity since anything with chocolate and espresso is okay in my book.

I like to serve these with a variety of sauces to top the cakes off.  Raspberry goes with anything chocolate of course, but something I love that’s a little different is a white chocolate mascarpone cream sauce. This sauce couldn’t be any easier; you can use it in place of whipped cream. People will love it!

Chocolate Espresso Molten Cakes


1/2 cup unsalted butter, plus more to butter the molds
4 ounces bittersweet chocolate
2 eggs
2 egg yolks
1 tsp. coffee extract
1/4 cup sugar
¼ teaspoon espresso powder
2 teaspoons hazelnut flour

First, heat your butter and chocolate until the chocolate is completely melted. Mix eggs, yolks, coffee extract, sugar and espresso powder with an electric beater until light and thick.

Pour the egg mixture in with the chocolate mix. Add in the hazelnut flour and beat until combined. Butter four 4 ounce ramekins. Pour the batter into the molds. Preheat your oven to 45 degrees and bake for seven minutes. DO NOT OVER COOK.

You want the center to stay soft and the sides to set. It is a little difficult to tell in the pictures, but you may be able to see that the center is slightly soft since the color directly in the center is different than on the sides. You can either wait for the ramekins to cool and eat directly out of them or you can put the ramekin on a plate and flip it directly onto the plate. 

I would suggest serving with a dollop of fresh whipped cream, which is incredibly easy to make. Put some cream in a bowl and mix with an electric beater until it looks like whipped cream! Or serve with my white chocolate mascarpone cream! Buon Appetito!

White Chocolate Mascarpone Cream

5 ounces of white chocolate
1 cup of whipping cream
7 ounces of mascarpone cheese
1 tsp. vanilla extract

First, chop you chocolate and melt with 1/2 cup whipping cream in a metal bowl over a saucepan of gently simmering water. Remove from over the water and let the chocolate cool to room temperature.

In another medium bowl, whisk 1/2 cup whipping cream, mascarpone cheese and vanilla extract until blended and smooth. Fold melted chocolate into mascarpone. Let me know what you think! Enjoy!! 

Saturday, September 15, 2012

Spaghetti Sausage Pie


Ciao a tutti! Last night I knew I felt like making dinner but I wasn’t quite sure what to prepare. I looked through my refrigerator and it hit me! I had fresh eggs, sausage, parsley, garlic, ricotta and parmigiana, so…..Spaghetti Sausage Pie!! If you are familiar with the Food Network show “Chopped” you know that the premise of the show is to build a dish out of four ingredients in the mystery basket. Now, I don’t have a lot of the unusual ingredients that they showcase, but I love challenging myself and trying to figure out what to prepare just by seeing what foods I have in the house.

I love Pasta Pies. The great thing about pasta pies is that you can pretty much do whatever you like with them. For one thing, if you have some leftover pasta from a previous dish and want to spice it up, you can easily add some ingredients to it and bake into a fresh and delicious pie. It is also a great dish served room temperature for a picnic and it travels very well for a party. Like I said, I had sausage, but you can also make it with chicken, beef or vegetables. I cook my pasta al dente because when it is mixed with the egg and cheese mixture it will naturally soften up a little, so when you cook your pasta make sure that it doesn’t get too soft. This way, when it is out of the oven, the inside will be just creamy enough with the cheese and the outside should have a light crunch.

I made this with whole wheat spaghetti; as I’ve said before, I do what I can to make my recipes a bit healthier. Obviously, I am not going to try to pass this dish off as healthy, but every little thing counts. I had a nice slice fresh out of the oven with a side of sautĂ©ed zucchini. Let me know what you all think!!

Spaghetti Sausage Pie


2 tablespoons of olive oil
2 links of Italian sausage- hot or sweet, it’s up to you!
¾ cup of ricotta
½ cup of parmigiana
Salt
Pepper
Red pepper
Garlic-chopped
Parsley- chopped
2 eggs
½ a box of spaghetti

First, prepare a small pan with olive oil over medium heat and put the sausage in. Let it cook on each side for a few minutes. Once it has browned, flip to the other side, repeat flipping them every few minutes until they are fully cooked.

Start boiling a pot of water for your pasta and salt the water.

While the sausage is cooking, in a medium size bowl, mix ricotta, parmigiana, salt, pepper, red pepper, chopped garlic and parsley. All of the seasonings are to taste, so you can add as little or as much as you would like. In fact, what I like to do is try a little of cheese mix before I have added the eggs so I can see if it is well seasoned. Next, add the eggs and beat until thoroughly combined.

Once the sausage is done, let it cool for at least ten minutes. At this point, the water should be boiling so throw your pasta in. Spaghetti cooks very quickly, so stand by. While that is cooking, cut your sausage into slices and add to the cheese and egg mixture. Drain the pasta and run cool water it so it doesn’t instantly cook the eggs!!

I cook my pie in a traditional glass pie pan. You can also use a casserole dish if you like. Whatever you use, oil it so the pasta doesn’t stick. Heat your oven to 350 degrees. Add the pasta to the egg and cheese and stir. Put the pasta mix in your pan and into the oven, cook for 30-45 minutes. Everyone’s oven is different, so be sure to check in every few minutes. You don’t want the center soft and undercooked, but you don’t want it burnt. Once you the pie is done, let it sit for around fifteen minutes before serving. Serve with a nice side of sautĂ©ed vegetables or a fresh tomato and arugula salad. Buon Appetito!!

Monday, September 10, 2012

Guest Post: Chicken Marsala


Ciao a tutti!! Today I have a wonderful guest post to share with you by DB at Crazy Foodie Stunts. His site is a passion project, just like mine. Not a professional chef, but an everyday guy with a passion for food. I highly recommend taking a look at his blog and seeing what goodies he has to offer!!


Hi everyone! My name is DB, also known as The Foodie Stuntman. If you're unfamiliar with me, I write http://crazyfoodiestunts.blogspot.com/, Crazy Foodie Stuns,  where I make food at home that is often taken for granted and can easily be bought at any supermarket, cooking methods that are not common to many Americans and dishes that are challenging to prepare for someone with no formal culinary training. In the past couple of months, I've made my own ricotta cheese from scratch, boiled spaghetti in red wine to create purple pasta, and prepared a gelato without an ice cream maker. Quick and easy is just not my style.

I chose this dish out of curiosity, more than anything. It's a classic that has made it onto countless chain restaurant menus (Buca di Beppo, Carino's, Carrabba's, Romano's Macaroni Grill, Maggiano's Little Italy, Bertucci's, Olive Garden, The Old Spaghetti Factory and Pasta Pomodoro, just to name a few), but I wanted to improve the dish, in part because I've made my disdain for casual dining chains well known.

In many of the recipes I saw, the chicken was sautéed and then a pan sauce was made but I've adapted this recipe from Williams Sonoma because the chicken is braised for better flavor.http://www.williams-sonoma.com/recipe/chicken-marsala.html"

Ingredients:

3 tablespoons all-purpose flour
1 teaspoon kosher salt
1/2 teaspoon freshly ground pepper
6 boneless, skinless chicken breast halves, about 6 ounces each
3 tablespoons unsalted butter
3 tablespoons olive oil
4 shallots, minced
4 ounces bacon, diced
2 1/4 cups Marsala
1 cup chicken broth
2 teaspoons dried oregano
8 ounces cremini or button mushrooms, sliced 1/4 inch thick
1/2 cup mascarpone
3 tablespoons finely chopped Italian parsley (for garnish)

Method
1. On a plate, combine the flour, kosher salt and freshly ground black pepper. Dredge the chicken breasts in the flour mixture, shaking off the excess.


2. In a large sauté pan, melt half of the butter with half of the olive oil over medium-high heat. Working in batches if necessary, sauté the chicken breasts and cook until golden on both sides, about 5 minutes total. Transfer to a plate.


3. Add the shallots and bacon to the pan and sauté until lightly browned, 2 to 3 minutes. Add 2 cups marsala, increase the heat to high to reduce and thicken, stirring, approximately 7 to 10 minutes. Add the broth and oregano and return to a boil.


4. While the marsala is reducing, melt the remaining butter with the remaining olive oil in a second sauté pan. Add the mushrooms and sauté until they begin to brown, about 5 minutes. Stir in the mascarpone, bring to a boil, and season generously with salt and pepper. Add the mushroom mixture, the chicken and the remaining 1/4 cup marsala back to the first sauté pan. Cover and cook until the chicken is cooked through and the sauce has thickened, about 30 minutes more over low heat. Spoon the mushrooms and sauce over the chicken, garnish with parsley and serve immediately with mashed potatoes or pasta.


Before I went shopping for this dish I saw that I had some mascarpone in my refrigerator, but unfortunately, when I was ready to use it, I found it had already expired so I omitted it from the dish. I think it is used primarily as a thickening agent because the sauce was so flavorful on its own. My only reluctance to prepare this dish again is not with the dish itself; put the price of the marsala, which stretched my limit for cooking wine.


Please visit my blog, 'Like' me on facebook at http://www.facebook.com/crazyfoodiestuntsa , follow me on twitter at http://twitter.com/FoodieStuntman, on pinterest at http://pinterest.com/foodiestuntman or add me on Google+ at https://plus.google.com/u/0/?tab=wX#110507062230736999883.
As an incentive, I consulted a friend of mine who owns a micro bistro in San Jose who reworked this dish but head over to my site now to get http://crazyfoodiestunts.blogspot.com/2012/09/guest-post-at-la-cucina-prima-donna.html for the reworked version.

Lastly, I'd like to thank Carolina for hosting my dish on her site. It was a pleasure to be here.

Friday, September 7, 2012

Italian Chicken Cutlet and Caesar Salad

Anytime I have gone to some sort of formal Italian celebration, without a doubt there will be a lot of food, which goes without saying. But, the food I look forward to the most? It’s what I call Italian wedding “buffet” food. Crispy and crunchy on the outside and moist and tender on the inside classic Italian seasoned fried chicken cutlet. Perfect al dente spaghetti with garlic basil marinara sauce. And creamy Caesar salad. It’s incredibly simple and classic, but I love it. I love how well all the food mixes together. Have a bite of your chicken with some of the spaghetti or just with the sauce or mix your salad with the marinara? Or throw it all together is one bite and enjoy! It is so good.

I make my Ceasar dressing with a little balsamic vinegar; I really like what it does to the flavor. I also don’t just use plain old iceberg lettuce; I use crunchy romaine and peppery arugula, it gives the salad a nice kick. Now, I’m gonna be honest, I use ready made dressing. I LOVE Marie’s. It tastes homemade. You can make your own (which I have in the past) but sometimes if I don’t have the time, so I will just buy it.

Italian chicken cutlet brings back wonderful memories. When I was little and would go to my nonna’s, she would make me fried cauliflower, meatballs or fried chicken cutlet. Sometimes she made all three, since she knew how much I loved them. I wasn't like other kids. She would bring my brother and I to McDonalds and get me nuggets, but I barely ate them because I really didn’t like them. So, she would cook, just for me. For today, I will be sharing with you my Italian seasoned fried chicken cutlet and Caesar salad; the pasta will come tomorrow!! Let me know what you think!

Italian Seasoned Chicken Cutlet


4 filets of chicken breast
1 cup of whole wheat bread crumbs
Dash of salt
Dash of pepper
½ teaspoon garlic powder
½ teaspoon onion powder
½ teaspoon dried basil
¼ cup of parmigiana cheese
1 cup of canola oil
 2 eggs
1 cup of flour

Start off by getting your chicken out. Lay it on a cutting board with a large piece of plastic wrap directly covering the board. Put your chicken on the board and use the plastic the cover it. Start pounding away until it gets nice and thin. Repeat this method with every piece of chicken.

Next, start making your bread crumbs mix in a shallow bowl, big enough to put your chicken in. Combine the whole wheat breadcrumbs, (you can use whatever breadcrumbs you want, I just look for any way to tweak it and make it slightly “healthier) salt, pepper, garlic powder, onion powder, dried basil and parmigiana cheese.

Whisk the eggs; again use a shallow bowl for the chicken. Next, put your flour in a bowl (you guessed it! Shallow and big enough for the chicken!)

Take the chicken and dip it in flour, make sure the chicken is mostly coated. Pick it up and let a little of the flour shake off. Now put the chicken in the egg and make sure it all gets wet. Next, put it in the breadcrumb mix and really use your fingers to get everything to stick nicely. Repeat this with all of the chicken. Put all of your coated chicken breasts on a plate for the mixture to really set it.

Prepare a deep frying pot with 1 cup of canola oil over high heat (I don’t use olive oil to fry; I find it can be too bitter.) Let the pan get very hot. Start by slowly putting the chicken in, one at a time. Let it cook on each side for around 8-10 minutes (every stove’s heat varies, so please make sure it is thoroughly cooked!) When you have done this with all of the chicken, carefully take them out of the pan and put on a plate to dry. I like to cover my plate with a paper towel to soak up excess oil. Let it cool for at least ten minutes before serving. Next up…Caesar salad!!

Caesar Salad

1 large stalk of romaine lettuce
2 handfuls of fresh arugula
Pinch of salt
Pinch of pepper
¼ cup parmigiana cheese
3 tablespoons Marie’s Caesar dressing (use whatever brand you like!)
2 tablespoons balsamic vinegar

Clean your lettuce and then chop it. Put it in a large bowl. Add the fresh arugula directly on top of the lettuce. Toss. Sprinkle in salt, pepper and cheese. Toss again. Add the dressing and balsamic vinegar, toss some more!! Serve your cool, crunchy and creamy salad with a nice and warm Italian seasoned chicken cutlet. Buon Appetito!! 

Tuesday, September 4, 2012

Almond Cheesecake Pancakes


Sunday brunch has pretty much become a tradition in my house. My mother and I always went for brunch on the weekends and don’t get me wrong, we’ve had our fair share of amazing brunches, living in New York and all, but we kind of got tired of the whole scene. Making reservations, waiting for a table anyway, sitting in a loud crowded restaurant, so instead, we do the cooking now. And let me tell you, we love it!!

I usually plan my brunch menu a few days in advance so I know I have all the fresh ingredients that I need. I get up at my usual lazy Sunday time and start brewing the coffee and then the cooking begins!! I myself like sweet stuff for brunch. During the week I usually have oatmeal or yogurt for breakfast, so this is my time to cut loose!! But I mix it up. Sometimes I’ll make an Italian frittata or waffles or my favorite….pancakes.

Last weekend I made ricotta pancakes, one of my favorite foods. This weekend I made almond cheesecake pancakes. These are made with almond flour in place of white flour. Ricotta has a creamy, yet slightly grainy texture and the almond flour adds a nice nutty crunch, together….WOW. That’s all I can say. The inside of the pancakes are creamy and crunchy, yet smooth at the same time. The outside is slightly crisp. They practically melt in your mouth. One of my little secrets is separating the eggs and beating the whites separately, which really makes them fluff up! These are also gluten free.

These are a wonderful change from regular pancakes. As I said, I absolutely love pancakes, so I am always looking for something fun and new to do with them. I hope you enjoy these as much as I do!!

Almond Cheesecake Pancakes


2 cups of almond flour
1 tsp baking soda
¼ tsp. salt
3 eggs, separated
¾ cup of almond milk
2/4 cup of Ricotta cheese
2 tbsp. of melted butter
1 tsp. vanilla extract
1 tsp. maple extract
1 tsp. pure maple syrup

First, preheat your griddle over medium heat. Next, in a small bowl, mix the almond flour, baking soda and salt. Next, separate the egg whites from the yolks. Put the egg whites in a medium bowl.

Put the eggs yolks in a big bowl and add the melted butter. Make sure the butter has cooled before adding, you don’t want to end up with little bits of cooked eggs in your pancakes!! Whisk together. Add milk, ricotta,  butter, vanilla extract, maple extract and maple syrup. Whisk some more.

Add the dry mix to the egg yolk mix. Whisk thoroughly so it’s not lumpy, but don’t over beat. Now, whisk your egg whites until they are glossy and foamy. Fold the whipped eggs whites into the batter, do so carefully.

Grease the griddle with some more butter and start forming your pancakes. I find that each side takes around 5 minutes to cook. Almond flour can burn easily since it is very delicate, so stand by the whole time!! I personally like mine a little golden though, but that might just be me. Serve while nice and warm and enjoy with a cappuccino- (but no cappuccino after noon, that’s an Italian no no!)  Buon Appetito!!